Getting Started: System Configuration
Please note: Enabling E2D initiates billing. For billing details, please contact your account manager or see: https://www.aqilla.com/solutions/ai-invoice-capture-automation
Automatic purchase invoice processing is available to all users.
-
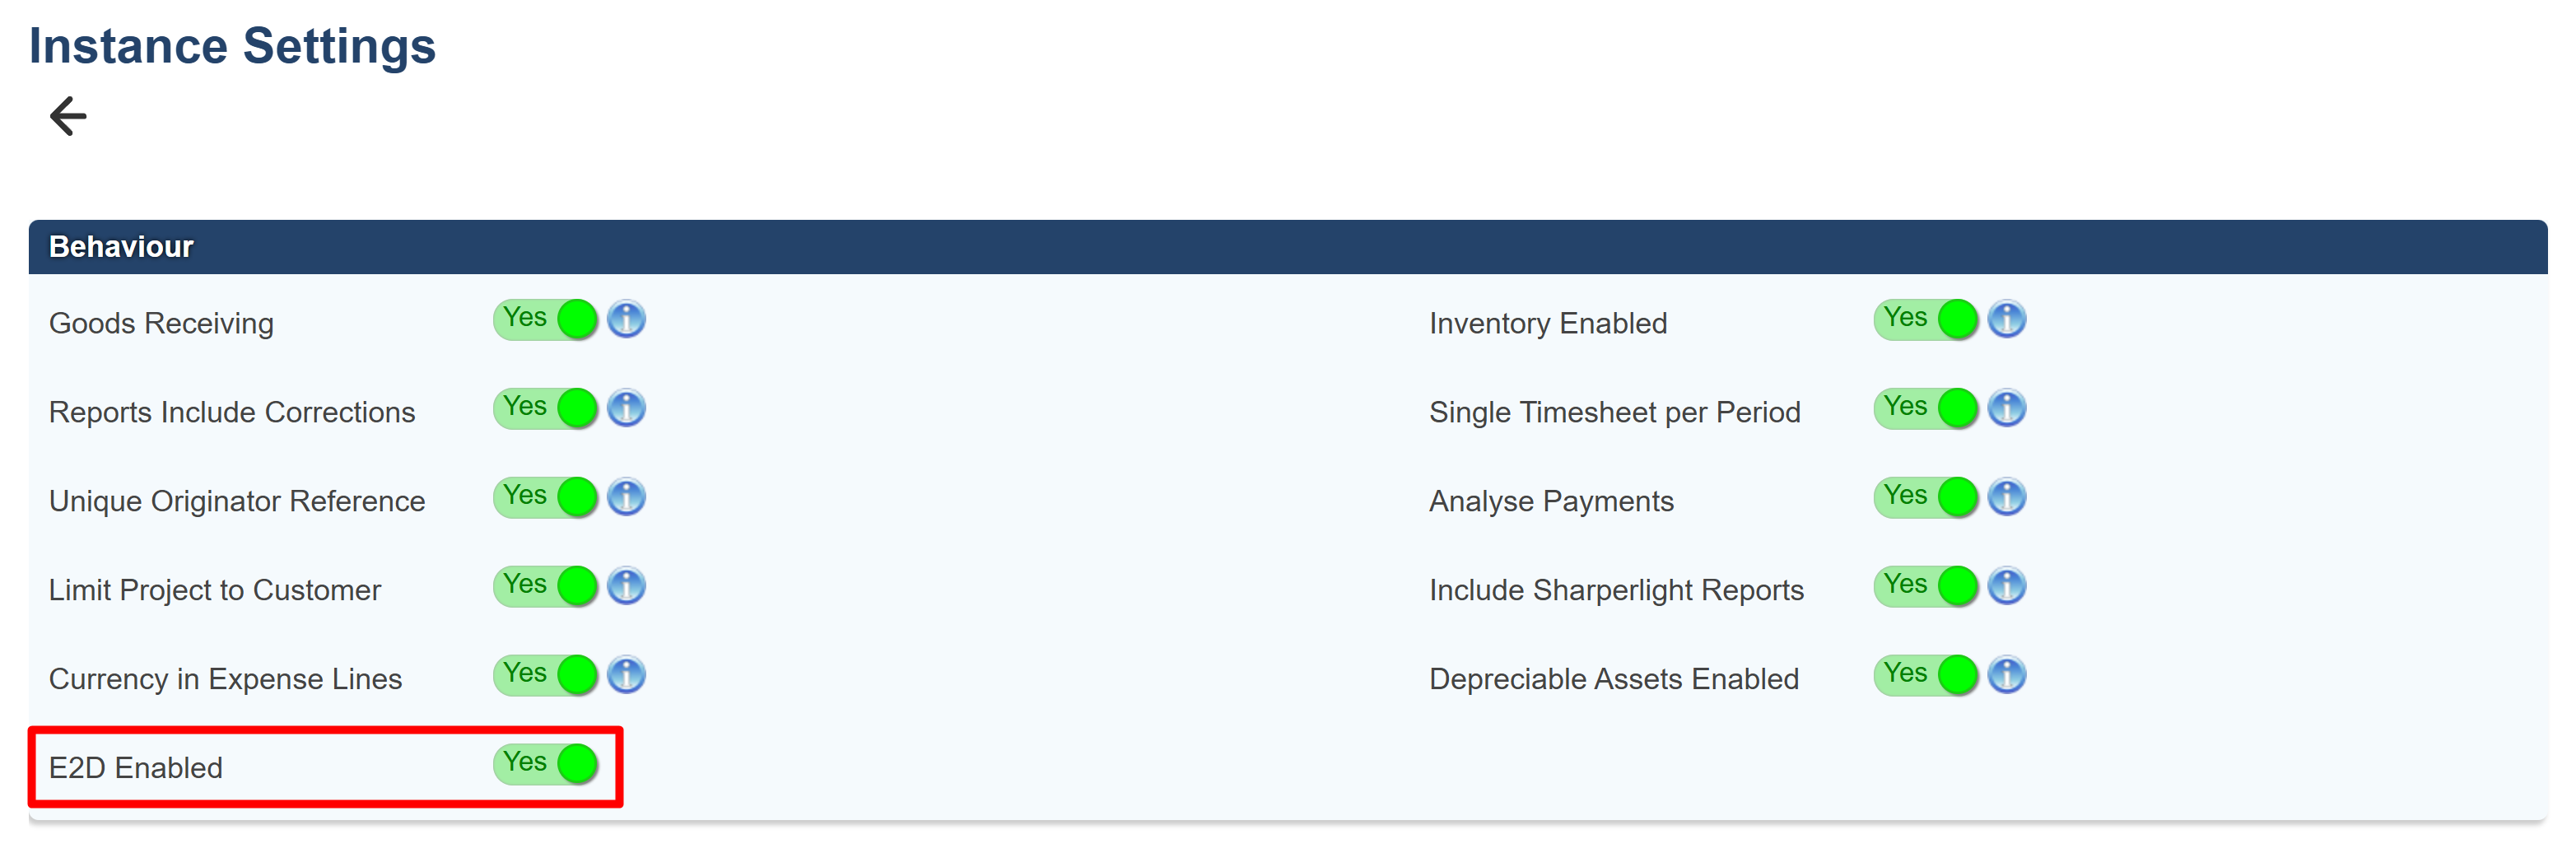
To enable this feature, go to Configuration >> Instance Settings and set E2D enabled to Yes.
E2D - E2D Settings
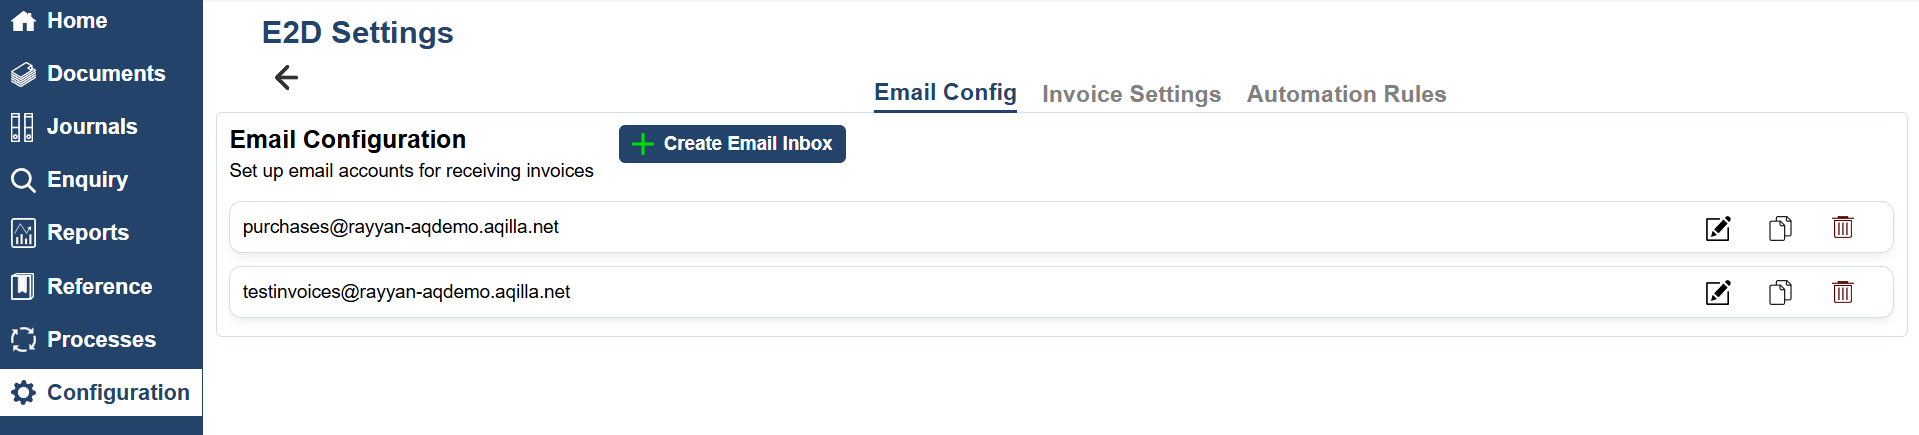
Go to Configuration >> E2D settings to determine how the system is to treat invoices imported to E2D. This applies to all companies within the instance.
Email Configuration
The Email Configuration gives you the option to set up an email account for suppliers to send in their purchase invoices.
-
Navigate to Configuration > E2D Settings.
-
You’ll see an empty Email Configuration page by default.
-
Click Create New Email Inbox.
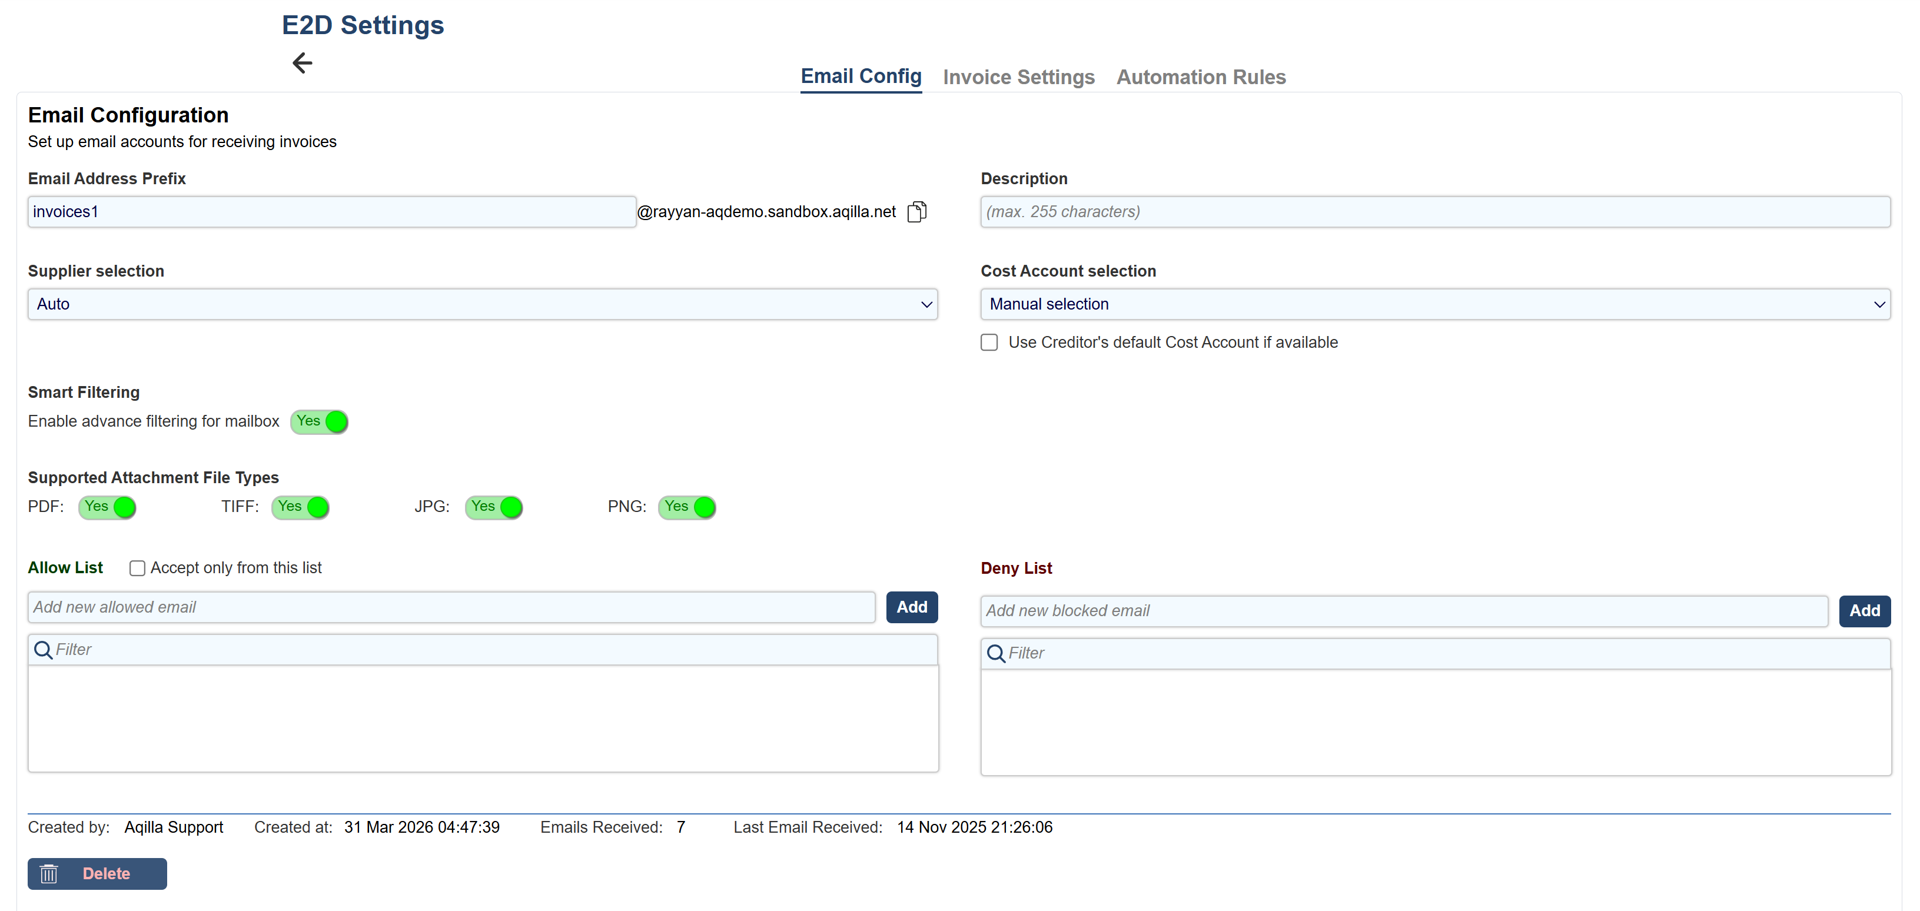
After clicking the button, the Email Account settings will appear.
-The email address prefix is the name before the @ symbol. By default, a random name is generated, which you can modify; the suffix is your instance name. e.g. invoices@demo.aqilla.net
Suppliers sending invoices to this address will have their communications automatically directed to your Purchase Invoice inbox, simplifying the management of incoming invoices.
Set up a group email account including your E2D email address for full visibility of emails emails received.
|
Field Name |
Description |
|
Email Address Prefix |
Create a distinctive prefix that can't be easily replicated by malicious users trying to impersonate or interfere with the system. |
|
Description (Optional) |
Optional description of the purpose of the inbox. |
|
Smart Filtering (Default on) |
Additional filtering |
|
Supported attached files types |
Click to enable the following file formats: PDF (default on), TIFF, JPG & PNG: |
|
Allow list |
List of email addresses that can send to this inbox *option to limit the recipients to allow list only |
|
Deny List |
List of emails that will be blocked and not processed by this inbox. |
Invoice Settings
|
Field Name |
Description |
|
Automatic Purchases Invoice Creation |
If enabled, set the Confidence Threshold. Invoices above this threshold will be automatically processed and recorded as a purchase invoice in an Entered state. |
|
Purchase Invoice View |
If enabled, base-currency invoices will appear in Purchase Invoice M/C (or the corresponding named view) instead of the standard Purchase Invoices view. |
|
Description Handling |
If enabled, the system will automatically trim the description to the maximum character length allowed. |
|
Negative Invoices Handling
|
If enabled, allows credit notes to be created when invoices are negative |
|
No VAT mode |
Used when the company within the instance does not process VAT, if enabled, gross value will be posted as net and gross values with VAT posted as a 0 |
|
Enable Public Access to Originals |
Creates public URLs for invoices, allowing non-Aqilla users to view them. Note: This function poses a potential security risk that your technical team should review. |
|
Summarisation |
If auto summarise line items is enabled, set the number of line items that trigger a summary line. The Purchase Invoice then shows a summary line instead of line details |
|
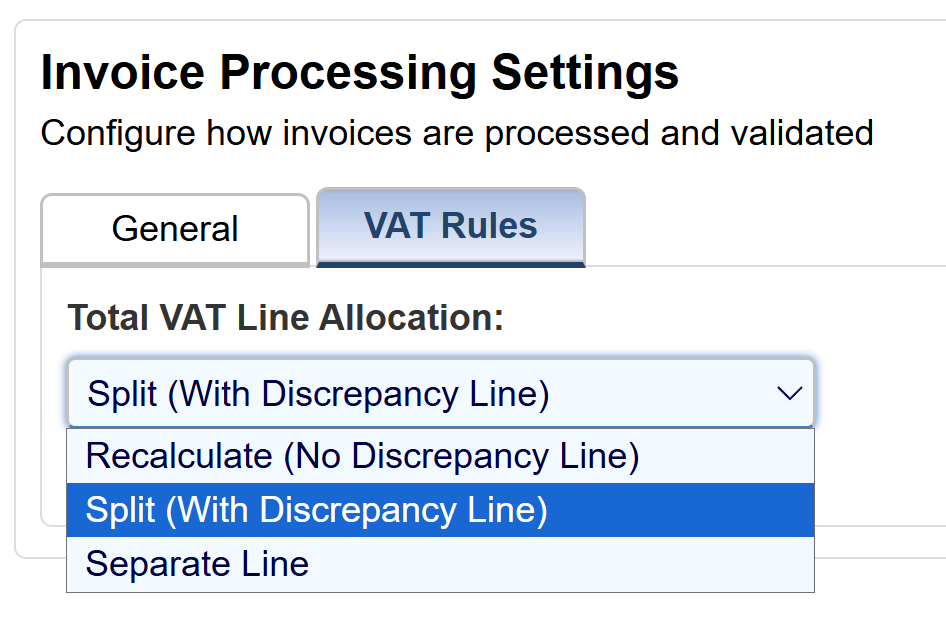
VAT rules |
Settings allow the system to recalculate tax using the document's overall tax rate (adding a "VAT Discrepancy" line if totals don't match perfectly) or create separate VAT-only lines that show tax amounts independently. |
VAT options
RECALC_WITH_DISCR - (Add VAT discrepancy line) If the sum of these individual calculations doesn't equal the document's total VAT amount, the system automatically creates an additional "VAT Discrepancy" line to account for the difference, ensuring the invoice balances correctly.
VAT_LINES - (Move all VAT to a single line) Sets all line items to zero VAT and creates separate VAT-only lines showing the tax amounts.
SPLIT_NO_DISCR - (Adjust VAT in last line) Any small rounding differences that occur during this calculation are automatically added to the last line to ensure the total matches exactly.